How To Remove Mold
Many people think that mold can only grow, or at least only predominantly grows, in high-humidity parts of the country. People in Florida, for example, regularly google “how to remove mold from the side of my house.” In Western Colorado and surrounding areas, that’s not such a big issue. No one’s asking anyone how to remove mold from their home’s exterior here because the environment is not humid. But just because our climate isn’t humid doesn’t mean that humidity can’t be produced in a home’s interior.
Our Homes Produce Humidity
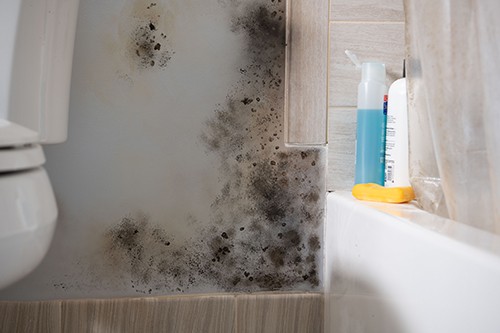
Mold growth is very common in kitchens and bathrooms in Western Colorado. As we cook, if we aren’t ventilating, humidity builds up from heating foods. The same thing happens when taking a shower if the bathroom fan isn’t on – the humidity from the hot shower builds up and moisture sits on your walls until it’s dry, day after day.
Homes that have water leaks aren’t always immediately detectable. Pinhole or slow leaks can drip or spray small amounts of water on the inside of walls for weeks or months. As the amount of moisture builds up, that water gets partially-absorbed into porous materials like wood and drywall. Over time, that amount of sitting moisture creates the perfect environment for microbial growth.
Mold Spores And Health Problems
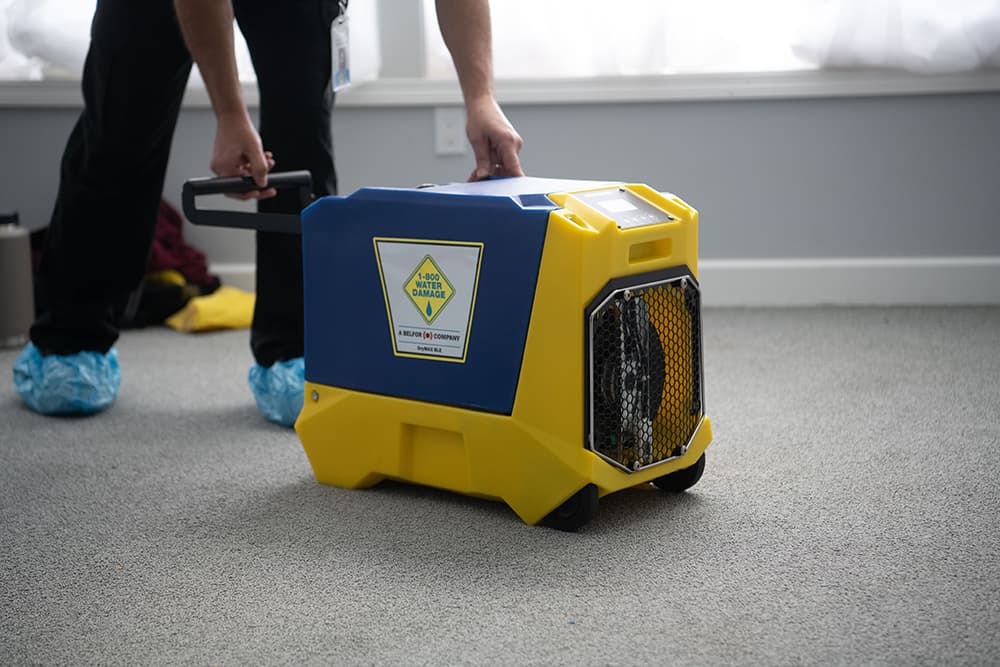
Of course, mold growth in a home isn’t really a problem until it becomes a health problem. Some people are very resistant to mold spores while others are hugely susceptible. As a professional mold remediation company, we never recommend that anyone attempt mold removal on their own. There are hundreds of videos on YouTube and hundreds of blogs on how to remove mold by yourself, without hiring a professional mold removal service. It is possible to perform mold remediation on your own. We just don’t recommend it because health risks are so high. It’s extremely difficult to not just remove mold colonies, but ensure that mold spores do not become airborne and release into other areas of the home, without the right equipment (like negative air). Most people who attempt mold remediation end up making the problem significantly worse.
However, if you are absolutely set on doing your own mold remediation, we have some tips and techniques for you. If, at any point during your do-it-yourself project, you start to feel uncomfortable, want more information, or feel that you’re in over your head, STOP. Call us at 970-712-5298 or contact us on our website and let us come out to do a mold inspection for you.
How To Remove Mold
The very first thing you want to consider, which isn’t a free service, but can protect you and your family a lot, is to hire an indoor environmental hygienist. In comparison to hiring a professional mold remediation company, you’re still saving money by only hiring an indoor environmental hygienist. They will perform an indoor air quality test for you which will determine the types and quantities of mold you have in your home, if any. They will also provide you with a step-by-step protocol for exactly how to remove mold from your home, if it is present. There’s really no better way to answer the question of how to remove mold from your home than to hire someone to tell you specifically what to do.
However, if for whatever reason you really have no intention of spending any money on professional mold remediation or mold detection professionals of any kind, we still have some basic advice for you. For more information about mold damage restoration, we recommend you check out this page.
Create Containment Barriers
The worst thing that can happen when do-it-yourselfers attempt mold remediation in their own home is that they (quite often) disturb mold colonies without proper barriers in place, thereby contaminating the entire house. To removal the mold from your home you’re going to have to “disturb” the mold colonies, which will cause them to release more mold spores. The only way to prevent those spores from getting literally everywhere – including into your homes air ducts – is to set up 6mil plastic barriers around your work area.
Very small mold colonies might not require quite as much preparation as we’re going to suggest here, but it’s always worth the additional protection (and we want to make sure we’re giving you thorough information for whatever size mold remediation job you’re trying to handle).
Containment should be taped to the home’s structure, so it doesn’t move at all once work begins. Place a zipper in the middle of containment barrier areas (such as doorways) through which you’ll be entering and exiting. Be sure to cover over ventilation areas!
Wear Personal Protective Equipment
Wear personal protective equipment. You will want a full body suit so that mold spores do not get on your skin, into your eyes, nose, mouth, or ears. Get yourself a high-quality respirator with a full-face mask. You will want to get fit-tested for your new respirator at your local occupational health service center to make sure your body can handle the added stress of wearing one while working. People who have never worn respirators while working will be surprised at the additional effort it takes to breathe while wearing one.
You absolutely must not attempt mold removal without wearing a full-face mask. Additionally, if you attempt mold remediation without wearing a full-body Tyvek suit, you risk cross-contaminating the rest of your home or property with mold spores after you leave the affected area.
Any drywall, flooring, carpet, wood, or porous material of any kind that is not essential to the structural integrity of the home, severally affected by microbial growth should be cut out and removed from the home entirely. We won’t go into best practices here for size of cuts when removing drywall as that’s beyond the scope of this blog, but you can create a lot of additional work for yourself on the back end if you’re not cutting in straight lines.
Scraping, Cleaning, And Sealing
For sections non-removeable, we recommend scraping off the mold colonies with a wire brush, spraying the area with hydrogen peroxide (NOT bleach), HEPA-vacuuming, and “painting” with a sealant. In all reality, you should have a HEPA-Vac running during your entire mold remediation process, to clean the air of mold spores you’ll inevitably be spreading. Sealants are used to prevent moisture from getting to the mold colonies you’ve just removed. That might sound strange. If you remove mold, doesn’t that mean it’s… well, gone?
Not quite. Unless you’re physically removing mold from the building (like when we cut out sections of contaminated drywall, for example), even if you’re scraping mold off with a wire brush or using a “mold killer spray,” you’re not killing or removing every part of the mold. Dendrites, the mold’s “roots,” will always be in that porous material. The sealant should keep moisture from getting to those dendrites so they will remain dormant and no longer post a threat of further growth. Without sealant, water can reach the colony’s spores again, and it can regrow.
This is also why we recommend using hydrogen peroxide, and not bleach. The compounds in bleach can be used by mold colony roots as “food” for later re-growth.
In Summary
We at 1-800 Water Damage of Western Colorado hope that if you’re one of those people googling “how to remove mold,” and plan to do it yourself, you’ll rethink that plan a little bit, and call us, instead. But, if you’re resolute or think the microbial growth is small enough for you to handle, we hope that you’ll at least call us for our professional insight into the matter. We are more than willing to help you by just taking a look.